TWO TOOLS:
Jig Saw (yes you can use one - this was my first time)
Screwdriver (I used cordless, but a regular one will work)
THREE ITEMS:
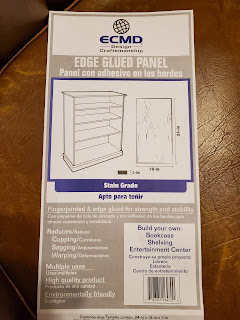
board (see the picture below - it is a shelf board from Lowe's)
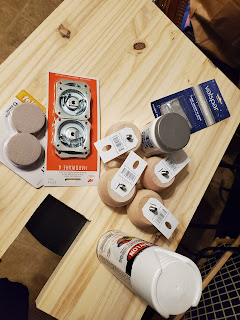
"A" hardware (Make sure you get A!)
bun feet (You need four of them.)
Plus optional items (keep reading)
OPTIONAL:
Paint (I used purple! You can use other colors, but I don't know why you would. PURPLE IS THE BEST).
*white paint as a base (made the purple show up better)
Valspar crystal sparkles - because glitter makes everything better
ALL items purchased at Lowe's.
INSTRUCTIONS:
Measure and cut the board so that your machine will fit right into the board. I had to decide how much space I wanted in the front and the back of the machine. I used a pencil and drew a line. I carefully used the jigsaw to cut on the line. (Watch You Tube videos if you are new at this.)
Then measure about two inches in for the feet hardware. I measured about two inches in for balance. I just made sure they were the same distance on each side.
The "A" style hardware are STRAIGHT. Make sure to notice this because there are other types and you might buy the wrong ones. I tried to put them in the same spot on each corner. I placed one to see what I thought looked good, then measured it, so the other ones would match. Don't over complicate this. Just put them on there! :)
The screws were easy to do because the wood isn't like a regular board.
Attach the feet.
Paint.... if you prefer. I put about 4 coats of paint because it soaks up the paint fast! I painted the underneath and I painted the feet!
Only add the paint when you are ready to paint it. It will show up in the paint when it dries. Of course I used the whole package in one can of the "sample" sized paint. I prefer LOTS of glitter! I waited a couple hours in between the coats of paint. I did it outside in the heat, so that it would dry fast! (After it sits a few days, the glitter dissolves, so be sure to paint it right away.)
ENJOY YOUR NEW TABLE!!
P.S.
I used 2 part epoxy (and glitter) to give it an extra smooth finish. Then waited several days for it to cure. Lastly, added another thin layer of 2 part epoxy. It has a very smooth finish and you can see the beautiful glitter as well!
IT WAS A SUPER FUN PROJECT!


This is truly an awesome bit of reading, not many blogs compare to the amount of clear info given away here for free!
ReplyDeleteLocal IT Consultant | Refreshing Technology
Thanks for the useful post! I would not have gotten this otherwise!
ReplyDeleteMay I reference some of this on my page if I post a link back to this page?
Free Download PUBG
ReplyDeleteHey mate, thanks for sharing but this page doesnt format correctly in Chrome it is is overlapping.
Just want to say your article is astounding. The clarity in your post is simply spectacular and i can assume you are an expert on this field. Well with your Web Design and Development
Big recieved document! mum really enjoyed scaning the great article! Thank you loads
ReplyDeleteIt is rare for me to find something on the cyberspace thats as entertaining and fascinating as what you have got here. Your page is sweet, your graphics are RCG ONLINE STORE